Welcome to our Frequently Asked Questions (FAQ) page! Here, we have compiled a list of common questions and concerns that our customers often ask us. Whether you are a new customer or a long-time user of our products or services, we hope this page will provide you with helpful information and answers to your questions. If you don’t find what you are looking for here, please don’t hesitate to contact our customer support team who will be happy to assist you.

Equipment

The cost of a dental chair can vary widely depending on whether it’s new or used, the features, quality, and brand of the chair. In general, a basic dental chair may cost between £4,000 to £12,000, while a high-end chair with advanced features can cost upwards of £20,000 or more.

Other factors that can affect the cost of a dental chair include:

Additional equipment: Depending on the manufacturer and supplier, dental chairs may be sold with additional equipment, such as delivery systems, dental lights, or monitors, which can increase the overall cost.

Installation and servicing: The cost of installing and servicing the dental chair can also affect the overall cost.

Warranty and after-sales support: Chairs with longer warranties and better after-sales support may have a higher cost upfront but can be more cost-effective in the long run.

Buying a dental chair is a big investment, so it’s important you find the right one to suit your needs and your practice. See our dental chair guide on what you need to consider when selecting the right chair for you.

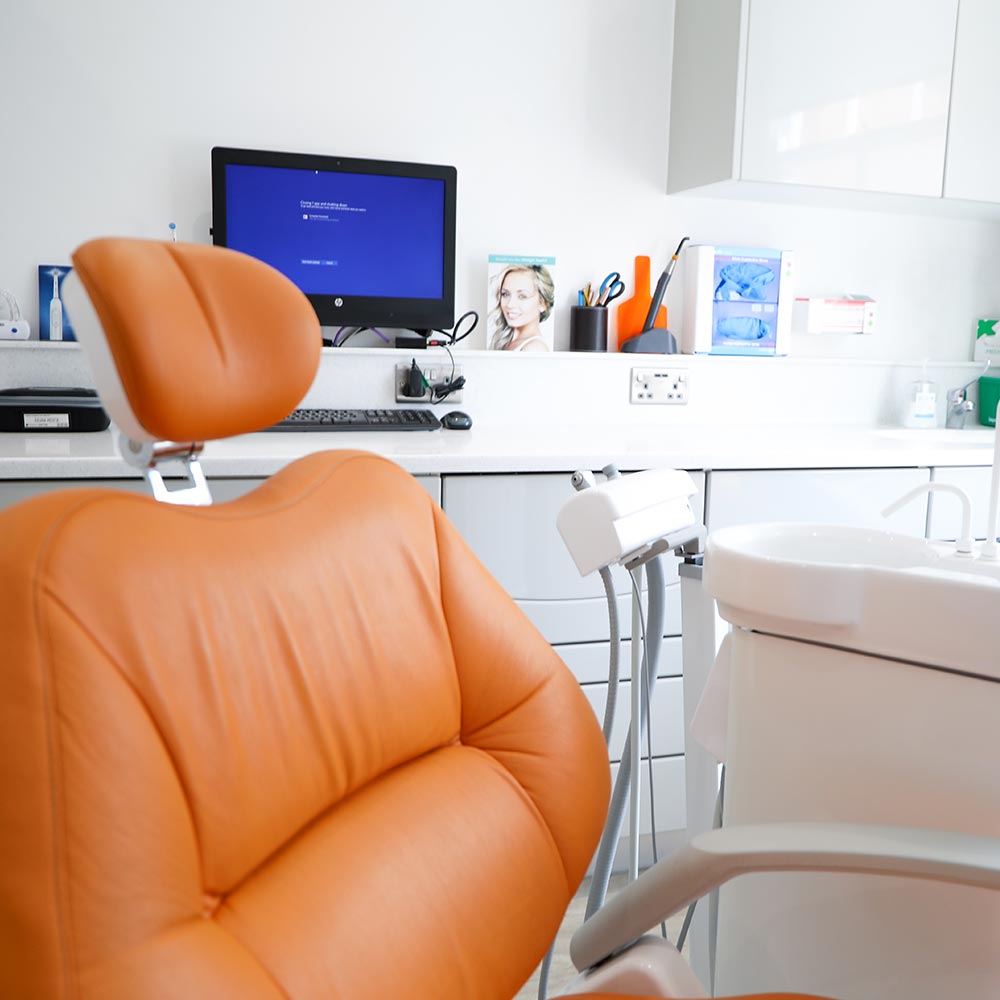
Dental chairs are typically made of a combination of materials, including:

Metal: The frame of the dental chair is usually made of metal, such as steel or aluminium, to provide strength and durability.

Upholstery: The seat and backrest of the dental chair are typically covered in a synthetic material, such as vinyl or leather, which is easy to clean and maintain.

Foam padding: Beneath the upholstery, there is usually a layer of foam padding to provide comfort to the patient.

Plastic: Many of the dental chair’s components, such as the armrests and footrests, are made of plastic to reduce weight and improve hygiene.

Composites. Composites are made of a mixture of two or more materials, such as metal and plastic. Composites are often used for the frames of dental chairs, as they are strong and durable while also being lightweight.

Electrical components: Depending on the model, dental chairs may have various electrical components, such as motors, switches, and control panels, which are typically made of plastic, metal, or a combination of both.

The type of material that is used to make a dental chair will affect its price, durability, and comfort.

Hague Dental Supplies are a leading UK supplier of new and used chair packages including world-leading brands A-dec and Belmont.

When choosing a dental chair, it is important to consider several factors:

Comfort: Choose a chair that provides maximum comfort to the patient during dental procedures.

Ergonomics: The chair should be adjustable to accommodate different patient sizes and provide proper support to the dentist during procedures.

Durability: Choose a chair made from high-quality materials that will last for a long time.

Hygiene: Select a chair that is easy to clean to prevent the spread of infections.

Features: Consider the features offered by the chair, such as programmable positions, LED lighting, and air abrasion systems.

Budget: Determine your budget and choose a chair that provides the best value for money.

After-sales support: It is important to consider the after-sales support and warranty offered by the manufacturer or supplier.

Buying a dental chair is a big investment, so it’s important that you select the right one to suit your needs and your practice. See our dental chair guide on what you need to consider when selecting the right dental chair for you.

Regular cleaning:  Clean the upholstery regularly. Use a mild soap and water solution to clean the upholstery. Avoid using abrasive cleaners or scrubbing pads, as they can damage the upholstery.

Lubrication: Lubricate the chair’s moving parts with a suitable lubricant to ensure smooth operation.

Waterlines: Check the waterlines regularly to make sure the waterlines are clean and free of debris. You can use a waterline flushing system to help clean the waterlines.

Disinfect: Disinfect the chair after each patient. Use a disinfectant to kill any bacteria that may be on the chair. You can use a commercial disinfectant or make your own by mixing one part bleach with nine parts water.

Suction: Run the suction cleaner regularly. Use the suction cleaner to remove any debris that may be in the chair’s suction hoses. This will help prevent the chair from clogging up.

Delivery Unit: Clean the delivery unit traps regularly. The delivery unit traps collect debris that is flushed down the chair’s waterlines. You can clean the traps by removing them and rinsing them with water.

Inspection: Inspect the chair’s components, such as the upholstery, armrests, footrest, and headrest, for signs of wear and tear. Replace any damaged parts immediately.

Calibration: Ensure that the chair is calibrated correctly, especially if it has electronic components.

Electrical safety check: Perform a periodic electrical safety check to ensure that the chair’s electrical components are working correctly.

Regular servicing: Schedule regular servicing with a qualified technician to ensure that the chair is in good working condition and to identify any potential problems before they become major issues. 

By following these steps, you can help ensure that your dental chair remains in good working condition and provides a safe and comfortable experience for your patients.

In line with Care Quality Commission guidelines, HTM and HSE regulations, most manufacturers now recommend that you service your equipment annually; this is sometimes called Pre-planned Maintenance (PPM). See Annual Equipment Servicing for more details. 

Yes, if you have a rip or a tear in your chair or headrest upholstery, then in line with CQC requirements you will need to replace this. Or perhaps the chair is just looking a little worse for wear.

We offer two solutions:

  • Upholstery direct from the manufacturer. Talk to our team about a price for a new set or part set that will be from your chair manufacturer. Prices can be higher but can avoid costly downtime and call-outs.
  •  
  • Re-Cover Current Set or Part Set. We hold sets of loan upholstery (note not all old models) so that we can remove your current seat and headrest, to ensure you can carry on practising with very minimal disruption.
  •  

We offer a large range of colour and fabric options, to fit in any practice’s décor, including the current ranges from A-dec and Belmont.

The specific number of autoclaves required for a dental practice under the Care Quality Commission (CQC) regulations in the UK may vary depending on factors such as the size of the practice, the volume of patient procedures, and the availability of alternative sterilisation methods. The CQC does not provide a specific requirement for the number of autoclaves a dental practice should have. However, dental practices are expected to have sufficient autoclaves to meet their sterilisation needs and ensure compliance with infection prevention and control guidelines. Read more about the factors you need to consider to determine the number of autoclaves for your dental practice. 

Engineering

Need a repair on your dental equipment fast?

When something goes wrong in your practice, our team is ready to help immediately. One of our award winning customer service team members will be at the other end of the phone, email, or video chat if you prefer, to discuss the problem and to assess the extent of the issue.

If it is an emergency, we will make arrangements for an engineer to talk you through the problem remotely (sometimes saving you costly call-out fees); and/or to visit your practice at a time that is convenient for you.

We strive to ensure your repair is upon this first call-out. We are proud to offer a very high first-time fix rate.

You can trust in the experience and expertise of our engineering team as every member is required to attend all the necessary training courses available from the world-leading manufacturers of the products we supply, as well as updating and refreshing their knowledge whenever appropriate.

Our team are authorised dealers and offer maintenance, service, and repairs to the following manufacturers: A-dec, Acteon, Belmont, Bien Air, Cattani, Durr, MK-Dent, Fedesa, MGF, NSK, Planmeca, Vatech and W&H.

Please enquire with our customer support team about service and repairs of other manufacturer brands as well. 

Whether for your annual service, installation of equipment, or a dental equipment repair, our team ensure that the work is completed at a time that’s convenient for you and your team. At times we may have a high volume of requests,but we will do our very best to respond timely to any emergency repairs. Our customer service team will keep you updated in this regard.  

Often we can asked to perform additional tasks whilst on site. 

Each diagnostic engineering visit is allocated a 1 hour time slot; if the engineer is expected to attend to more than one issue please inform us prior to the visit so we can ensure that we allocate sufficient time. If our dental engineer completes the pre-booked task earlier than anticipated and still has time, we would do our very best to accommodate you. 

Our dental engineers carry a high amount of stock on their vans however if a special order part needs to be ordered you will be sent a quotation for a follow up visit by our customer service team. 

Yes, we will try our very best to get your practice up and running with the provision of loan equipment, subject to availability. The cost of the loan equipment will be agreed with you in writing prior to delivery and installation.

We do offer a fixed lunchtime appointment slot, subject to engineer availability. We will ensure that the engineer is blocked out either side to guarantee a set arrival time for you. Charges for this service will be provided at the point of booking. 

Spares and Consumables

Hague Dental can supply a wide range of spare parts and consumables for your dental equipment. To ensure we quote on the correct item, we require information on the manufacturer make, model, as well as a video or picture of the item. Please send an email, together with the video or photo, name of practice, and postcode directly to sales@haguedental.com and one of our team members would be happy to assist you.

Squat Practice Design, Refurbishment or Relocation

The time it takes to refurbish a dental surgery can vary depending on several factors, such as the size of the surgery, the scope of the refurbishment, and the availability of resources. It’s important to consult with a professional dental practice design or dental surgery design company to determine a realistic timeline for your specific project based on its unique requirements and constraints. Herewith a rough outline of a single surgery refurbishment:

Day 1: Removal of existing dental equipment by Hague’s qualified Dental Engineers. Tradesmen will then strip out the existing cabinetry and flooring.

Day 2 – 6: Electrics and plumbing will commence to move and install new services as required. Alongside this, any new stud walls or overboarding of ceilings/walls will take place. Existing and/or new cabling will be chased into the walls. If there is any adjustment to the chair services these will be made. There is normally a fair amount of ‘making good’ prior to the room being fully decorated.

Day 7: Specialist vinyl flooring with welded joints, and capped and coved edges will be installed.

Day 8 – 9: Cabinetry will be installed in accordance with approved plans to provide you with medical grade storage and working facilities. 

Day 10: Hague’s qualified dental engineers will return to site and deliver and install your new dental chair, as well as any other equipment you may have purchased from us.

A final medical grade clean will be required prior to the room being fully operational. 

When embarking on the cost estimation process for a new build or refurbishment, it is crucial to have a clear understanding of your overall objectives and the necessary requirements. This knowledge will enable you to create an accurate budget that encompasses all aspects of the project. See the full article including budget estimates

CAD – computer-aided design – is a way to create digital 2D plans and 3D models of real-world practices before any work commences.

Following a site visit from a Hague sales representative and a full room or practice survey with laser precise instruments, all the necessary information is passed on to an in-house CAD designer, who can create either a 2D or 3D representation , depending on the level of visualisation required.

See our article on a new dimension for planning and visualisation for more information. Speak to us today to arrange a site survey. 

Utilising a good-sized area, an ambidextrous package with cabinetry solution plus mobile lockable cabinets can create an adaptable solution for a shared room. Exploring surgery design concepts alongside a large range of chairs in the showroom ensures you make the right investment.

There are many ways to contribute to a better working position – try out and choose the most suitable model equipment for you and consider the positioning of your stool, chair, and cabinetry as well as the angles you are working in.

Yes, we encourage you to visit our 4,000 sq ft Showroom and Design Centre near Gatwick. See up to 12 dental chair packages, dental cabinetry solutions, reception desks, decontamination room, plant room, waiting room furniture, and our interior design area with samples and brochures.

Yes certainly we could, or potentially we could order the same model in the new colour (so the padding is more supportive) or try out other manufacturer offers in case there is a better solution.

When supporting you in making this decision we look at these four key elements: Room Size, Your Clinical Requirements, Future Proofing, and Budget. Often people already have a preference for a manufacturer. What works for a peer might not be right for you, so please ensure you visit a showroom before investing.

This is a specialist area ensuring an efficient flow of compressed air and suction to your surgeries and making sure the right services are installed under the floors and the right units are chosen is massively important. Our team are experts in this field and will provide options and ensure you make the right decision.

It’s worth exploring options for upgrading to a CBCT early on. Our team can provide a demonstration of a range of leading systems so you can experience the software and usability ensuring the quality of the image is right for you and within your budget. The team then ensures the room created is of adequate size and the services are installed, whether for now or for the future when the practice is more established.

See our article on CBCT Imaging Systems.

With nearly three decades worth of experience in developing squat projects, we ensure each new practice is compliant with all legislation. From the initial layout drawings through to the snagging, legislation is always in our consideration.

Our goal is to help you achieve the practice of your dreams and to ensure it is a compliant one. With a deep knowledge of CQC and its demands, our team are well equipped to help you pass CQC requirements.

Our team have helped numerous clients over the years to develop their ideal decontamination room, all whilst meeting CQC requirements. We know what it takes to create a beautiful, efficient, well-flowing space that ensures compliance.

We have our own in-house design team, who create CAD layouts and 3D visual walk-throughs to inspire you and develop not only an environment that works clinically but one that reflects the feel and look you want for your patients and team.

See our article on A new dimension for planning and visualisation

We can take your design a step further by offering bespoke reception desks, state-of-the-art- equipment, innovative cabinetry, practice signage, lighting, medical-grade flooring, furniture, upholstery samples, paint colours, and even ‘bespoke’ wallpaper or murals. Our designers and project managers work closely with you to bring the ideas to life! Working closely with you on budget as expectations vary enormously and can influence your costs.

Troubleshooting Tips

It’s important to exercise caution when attempting to troubleshoot any issues, especially when dealing with complex dental equipment. If you are unsure about any troubleshooting steps or feel uncomfortable about handling any equipment, please contact our Customer Services team to arrange a visit by a qualified and certified Hague engineer. 

Step 1: Ensure chair is switched on at the mains, and the compressor is supplying air to the chair.

Step 2: Is the chair on/off toggle and power switch on?

Step 3: Does the light come on (if chair mounted)? This will indicate if there is power.

Step 4: Does 3-in-1 have air? This will indicate there is air to the chair.

If you answered yes to all of these but the dental chair is not switching on, then a dental engineering visit is required. 

Step 1: Ensure chair is switched on at the mains, and the compressor is supplying air to the chair.

Step 2: Check chair safety switches.

Step 3: Check foot switch wiring loom (may be obviously damaged or coiled up, which can cause issues).

Step 4: Check no handpieces are running whilst in the holders, (if all handpieces are in holders properly, put your foot on pedal; if no handpieces run then the holders are in order).

If all of the above are working and the dental chair is not moving, then a dental engineering visit is required. 

Step 1: Ensure chair is switched on at the mains, and the compressor is supplying air to the chair.

Step 2: Check all handpieces are in their holders and not running.

Step 3: Check safety switches (usually under lift arm, under spittoon, and on delivery unit).

Step 4: Check foot pedal is exhausting air (press foot down onto pedal and listen for air).

If all of the above are working and the dental chair is still stuck, then a dental engineering visit is required. 

Step 1: Ensure chair is switched on at the mains, and the compressor is supplying air to the chair.

Step 2: Check the power and air.

Step 3: Check on/off toggle switch (if applicable, wiggle it to see if the light comes on, if yes, a new switch is required).

Step 4: Swap the bulb.

If all of the above are working and the dental light is still not switching on, then a dental engineering visit is required. 

Step 1: Ensure chair is switched on at the mains, and the compressor is supplying air to the chair.

Step 2: Check bowl filter; if bowl filter is missing, check drain hole to see if tissue, alginate, glove etc is blocking the drain.

Step 3: Check suction is running through HVE & SE.

Step 4: Check spittoon valve filter (be careful of spittoon waste water inside valve).

If all of the above are working and the spittoon is not draining, then a dental engineering visit is required. 

Step 1: Ensure chair is switched on at the mains, and the compressor is supplying air to the chair.

Step 2: Is suction weak or not there at all? If motor is switched on, is it clicking/buzzing/hot? If so, turn the motor off at the mains, allow ventilation to cool for 1 hour, test again once cooled.

Step 3: If suction is running but weak, check the filter on motor and chair.

If all of the above are working and the suction pump is still not working, then a dental engineering visit is required. 

Step 1: Ensure chair is switched on at the mains, and the compressor is supplying air to the chair.

Step 2: Remove the amalgam pot, empty content, refit and test.

Step 3: If still beeping, has the pump been running a long time? If so, is it very hot? If so, turn off at the mains, and allow to cool before testing again.

If all of the above are working and the suction pump is still beeping, then a dental engineering visit is required. 

Step 1: Make sure the power is on to compressor (maybe try a different plug socket).

Step 2: Check pressure gauge.

Step 3: Ensure drain tap is closed.

If all of the above are working and the compressor still has no pressure, then a dental engineering visit is required. 

Step 1: Ensure chair is switched on at the mains, and the compressor is supplying air to the chair.

Step 2: Is it giving a puff of water when air is used? If so, replace the tip O-ring.

Step 3: Is it dripping from the base of the tip when using water? If so, tip assembly must be replaced.

This may require a dental engineering visit for parts and labour. 

Step 1: If the X-ray is not giving an error code then the issue is likely with the film/plate.

Step 2: You can try another film/plate. 

If that doesn’t correct the issue, a dental engineering visit is required.